Now a days Push Notification is almost part of each and every application. Because it’s best way to communicate with your users. To keep them updated for each and every events related to application they are using. e.g. If you have news app then you will get instant breaking news on your mobile. Everyday you are seeing number of notifications on your screens for apps you are using. Here we will discuss about how to use Amazon SNS (Simple Notification Service) for your application.
There are many service providers available or you can also develop your own notification server for your application. Here I am writing about Amazon SNS (Simple Notification Service) being used with iOS application as client and Sails JS as a backend.
First of all let’s see how to setup SNS with your iOS application.
First of all you need to have Apple Developer account, here I am considering that you probably have Apple Developer account. You have already created your application for which you are going to set up notification.
Now you need to create push certificates here I have added screenshots and steps below to understand how to create that. You need to have CSR file. I am considering you have CSR file with you which we need to use for generating notification certificates.
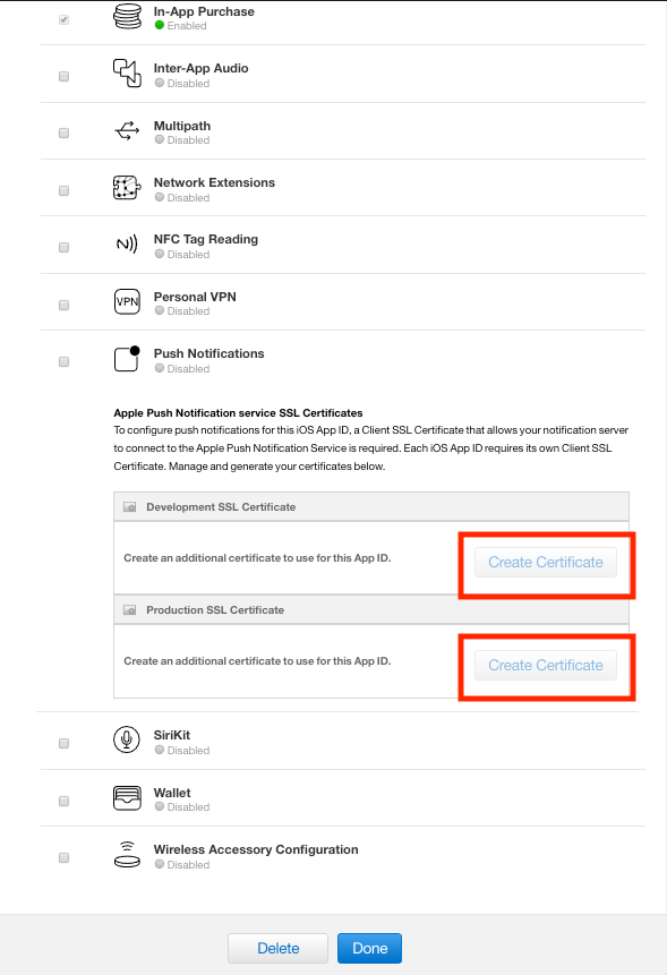
Now lets select identifiers from left panel, it will appear as shown in below image. Click on Edit button and move to Push Notification section. It will look like below screenshot.
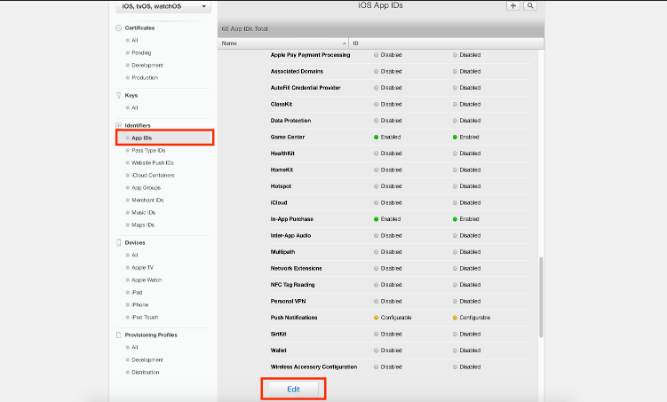
You will see option for development and production push certificate. Certificate generation process is same for development and production. Finally click on “Create Certificates” button. It will ask you to select CSR file and download generated certificate as shown in screenshot.
Now install that certificate on your Mac and export .p12 file from Keychain Access which will being used for notification set up with (AWS) Amazon SNS as shown on below screenshot. If you are using your own server for sending notifications then you will need PEM file to be generated from .P12 file. You can generate P12 to PEM file with this online tool.

Amazon SNS Setup
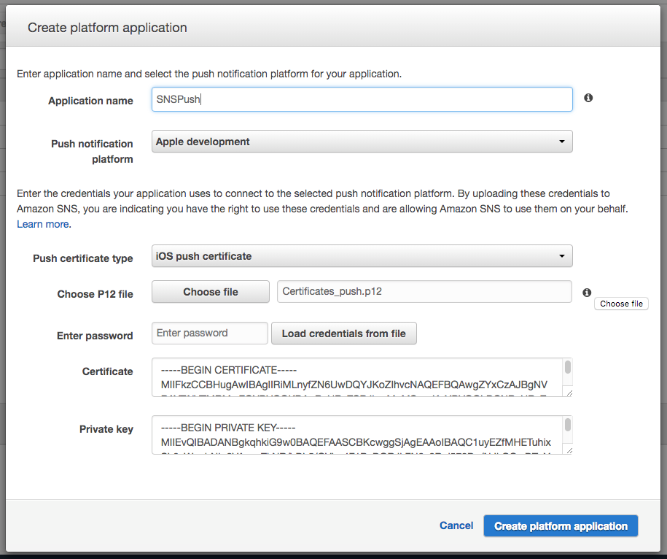
Let’s open SNS console of AWS and create new application as shown in below screenshot, fill up required information.
Application name : set application name and purpose. e.g “Dev_App_Name”.
Push Notification Platform : Select platform. e.g. iOS, Android, etc.
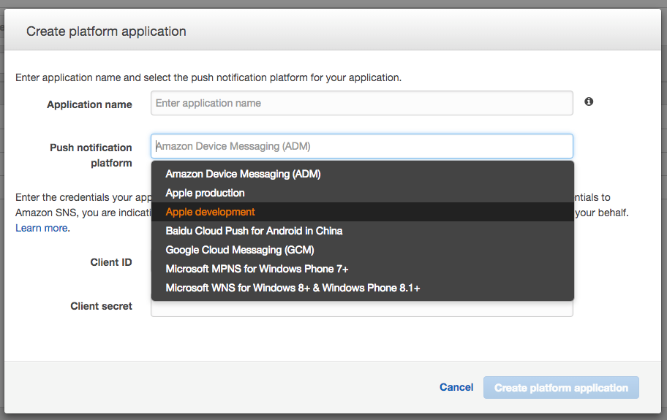
For iOS there are options as show on screenshot, select options as per certificates you have generated. Earlier there was only single option of normal notification. Currently apple provides great way of VOIP notification which will allow you to perform background operation while you receive notification on your iPhone. Hence most of the time Audio Calling, Video Calling and Messaging Applications are using VOIP notifications.
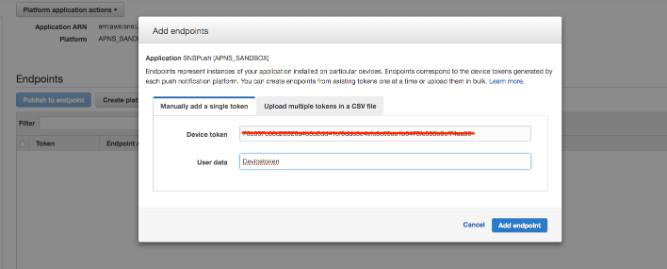
After creating the application you need to create end points as shown in below screenshot. For that you may need to run app on your device using certificated we have already created by following steps and you need to user print() or NSLog() to get your device token. Here is sample code for push notification setup.
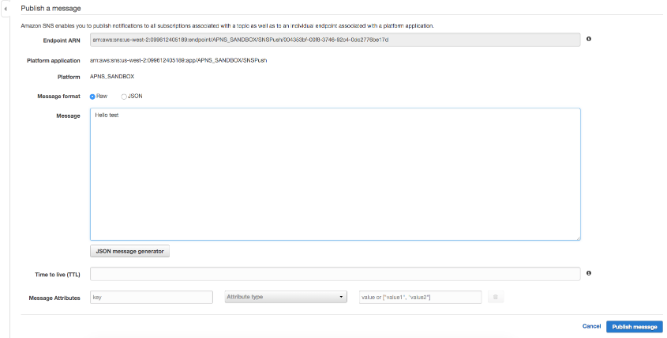
To send notification click on Publish to endpoint. It will open new window where you can type your message and click on Push Message button as shown in below screenshot.
Send notification using Sails JS.
Here I am using sails js for sending notification to mobile device either iOS or Android. To send notification using SNS we need to create ARN using AWS apis. Hence you will find sample code for how to call AWS API to create ARN.
To create ARN we need to pass device token, Application name, AWS access token and AWS access key. Upon calling API it will return ARN as a result which will be used to send notification to user device.
sns.createPlatformEndpoint({
        PlatformApplicationArn: "Your app ARN",
        Token: "Your device token"
    }, function (err, data) {
    if (err) {
         console.log("Create endpoint error : ", err.stack);
         return done(err);
     }
     sails.log("endpoint Arn", data);
}
Finally here is code to send notification using ARN.
//Create payload

payload = {
    default: payloadData.payloadData.mediadata,
    APNS_SANDBOX: {
    aps: {
          alert: {
          "title": titleNotification,
          "body": "Your payload data"
          },
          sound: 'default',
          badge: 1,
          action: "Message title or action you want to set"
        }
      },
      APNS: {
            aps: {
                alert: {
                "title": titleNotification,
                "body": "Your payload data"
            },
            sound: 'default',
            badge: 1,
            action: "Message title or action you want to set"
          }
       }
 };

// Send notification

sns.publish({
    Message: payload,
        MessageStructure: 'json',
        TargetArn:"Use Arn generated by above code block"
    }, function (err, data) {
    if (err) {
         console.log("notification send error ", err.message, err.code);
     } else {
         console.log('push sent');
         console.log(data);
     }
 });
Finally we have setup backend server and iOS provisioning profile setup for Push Notification. Thanks for reading this article, hope it will help. If you have any questions, feel free to comment below.