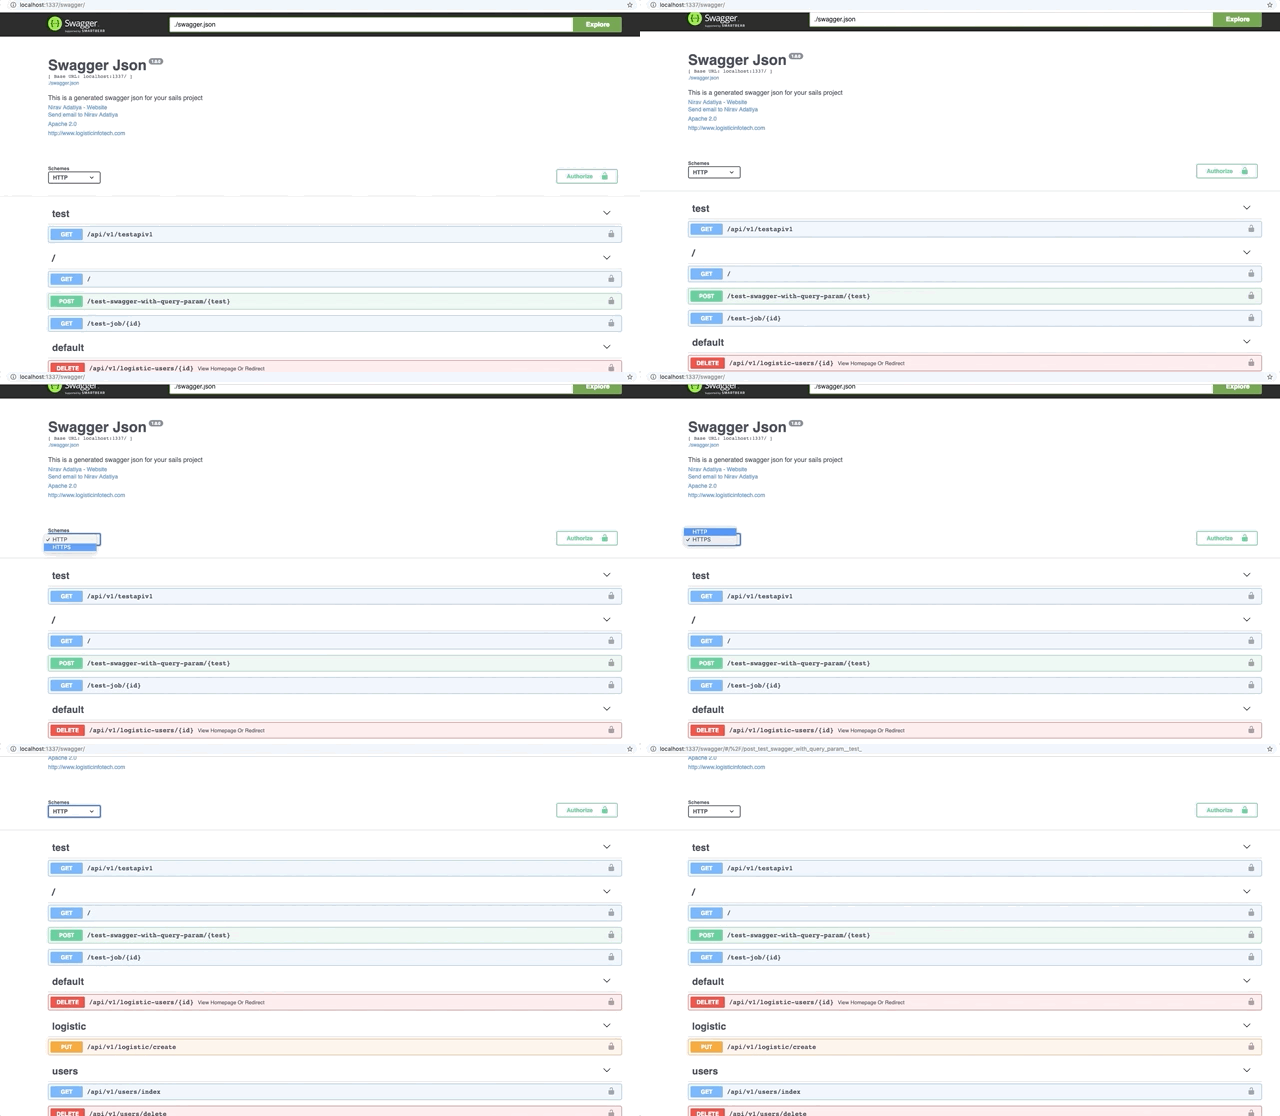
A sails hook actions2 swagger is an npm package that will automatically generate swagger doc (swagger.json) with inputs of actions2 and provides swagger-UI. It has also support for controller methods by specifying a swagger object in routes.js
Why should one can use this Hook?
In today’s world as a backend developer, we usually create API and then write it’s docs. So defining required fields, writing some descriptions about the endpoint. We also need to organize section vise endpoints. So far the best tool is the postman, but again for teams it paid tool and it doesn’t ship with a project. So either we have to provide postman collect link separately or need to keep it in project Readme.md.
Creating API in sails js is so easy but documenting it is more time-consuming. Again it is repetitive and developers never like to get distracted for it. But its necessary part one can’t ignore it also. Especially when the project gets bigger it’s so hard to keep updating docs manually.
To get rid of this headache and stay more focused on the development process, I have created this Sails hook actions2 swagger npm package.
It’s damn easy to use. All you have to do is use actions2 in sails js project when creating API and that’s it. This hook will map inputs automatically to swagger.
If you are using controller’s actions then it will map only routes and you need to write swagger object manually in routes.js. At the end of the blog will share a link of demo project that has many routes with actions2 and without.
Let’s start with Installation. Then will guide you more about its options and functionalities afterwords.
Installation
$ npm i @logisticinfotech/sails-hook-actions2-swagger
After installation just sails lift and browse swagger doc at http://localhost:1337/swagger. And BOOM!!! you should find a swagger-UI page with all your routes and its inputs (actions2 routes).

For nodemon users,
use nodemon --ignore 'swagger.json'
as we are generating swagger files in that folder, we need to ignore detection of changes.
Options and Customisation
Create swagger.js file inside your config folder (config/swagger.js). Copy and paste all setting from default swagger.js file.
You must declare swaggerConfig to work.
for ex. swagger.js should start with module.exports.swaggerConfig = {}
By default disable: false, you should disable it when it’s not needed because this hook generates swagger.json (doc) on every sails lift you done.
You can update
> defaults (default responses and security that will applied to all routes)
> basePath
> externalDocs
> host
> info (title, description, contact info, termsOfService, version etc.)
> parameters (WhereQueryParam, LimitQueryParam, SkipQueryParam etc.)
> auth token header key
> version of api
> securityDefinitions ( to pass authorization token)
Let’s start with some important and basic option
responses: You should find responses object with 200,400,500 keys, You can add or remove codes or edit description from here. for ex. “201” :{description:“Record created”}
security: You can set security headers from here (default: Authorization), Remember you need to declare same key inside swagger.securityDefinitions inside swagger.js you should find Authorization key. you can follow swagger guide for the same.
pathsToIgnore: You can ignore paths here for proper sorting in UI (default: [‘api/v1’]), you can ignore multiple paths from here
swagger object
Inside swagger object you can set basepath, host, schemes, externalDocs link, parameters and securityDefinitions you can always follow swagger official doc for in-depth knowledge. I am using some of this like
schemes : you can set schemes like http, https (default: [“http”, “https”]). You can always select protocols from UI dropdown in swagger.
Also you can always follow swagger official blog for more and in-depth knowledge.
On first run this hook will generate swagger.json on root of project.
Routes with Controller
Our library will map the only route to a swagger doc when you are using a controller, but you can set swagger object manually and it will map those data inside swagger.json for example:
'DELETE  /api/v1/logistic-users/:id': {

    controller: 'logistic/LogisticUserController',

    action: 'deleteUser',

    swagger: {

      tag: ['logistic-user'],

      summary: 'View Homepage Or Redirect',

      consumes: ["application/json"],

      produces: ["application/json"],

      responses: {

        "200": {

          description: "The requested resource 123123132"

        },

      },

      parameters: [{

          in: "path",

          name: "id",

          required: true,

          type: "string",

          description: "test parameter "

        },

        {

          in: "query",

          name: "obj",

          required: true,

          type: "string",

          description: "obj parameter here"

        }

      ],

      security: [{

        "Authorization": []

      }]

    }

},
As the above example is using controller’s action we’ve declared a swagger object with tag, responses, parameters, and security.
Same goes for routes that only have actions, priority will be given to the object you write in routes.js.
Override setting for exceptional routes
You must have a question that how to bypass some routes form authorization (routes like login/registration doesn’t require Authorization header).
Here is the simple solution for this just write swagger object and without security option (in routes.js to your route) and it will not pass header in the request.
'POST /api/v1/login': { action: 'api/v1/login', swagger:{}},
Feel free to report any bugs, request/suggest for any additional features and we will come up with a solution ASAP.
Finally, here is the link of GitHub example code which is having many routes.


